Distributed Systems Practice Notes
Cloud Web Apps - Launch Amazon EC2 VM
October 08, 2018
This tutorial introduces the management of AWS EC2 instance, also includes the remote access to EC2 instance via SSH client.
Prerequisites
- AWS student account
- SSH client
Official Links
Launch a Linux Virtual Machine with Amazon EC2
Operations
1. Create and Configure an EC2 Instance
Before you can access the AWS EC2 console, you need to set up an AWS student account.
Once logged into the console, click on the big blue Launch Instance button, which leads to the configuration wizard, where a list of preconfigured AMIs (Amazon Machine Image) is provided.
Simply pick one from the list (e.g. ami-6871a115 - Red Hat Enterprise Linux 7.5 (HVM), SSD Volume Type) by clicking on the big blue Select button, which leads to a list of instance types.

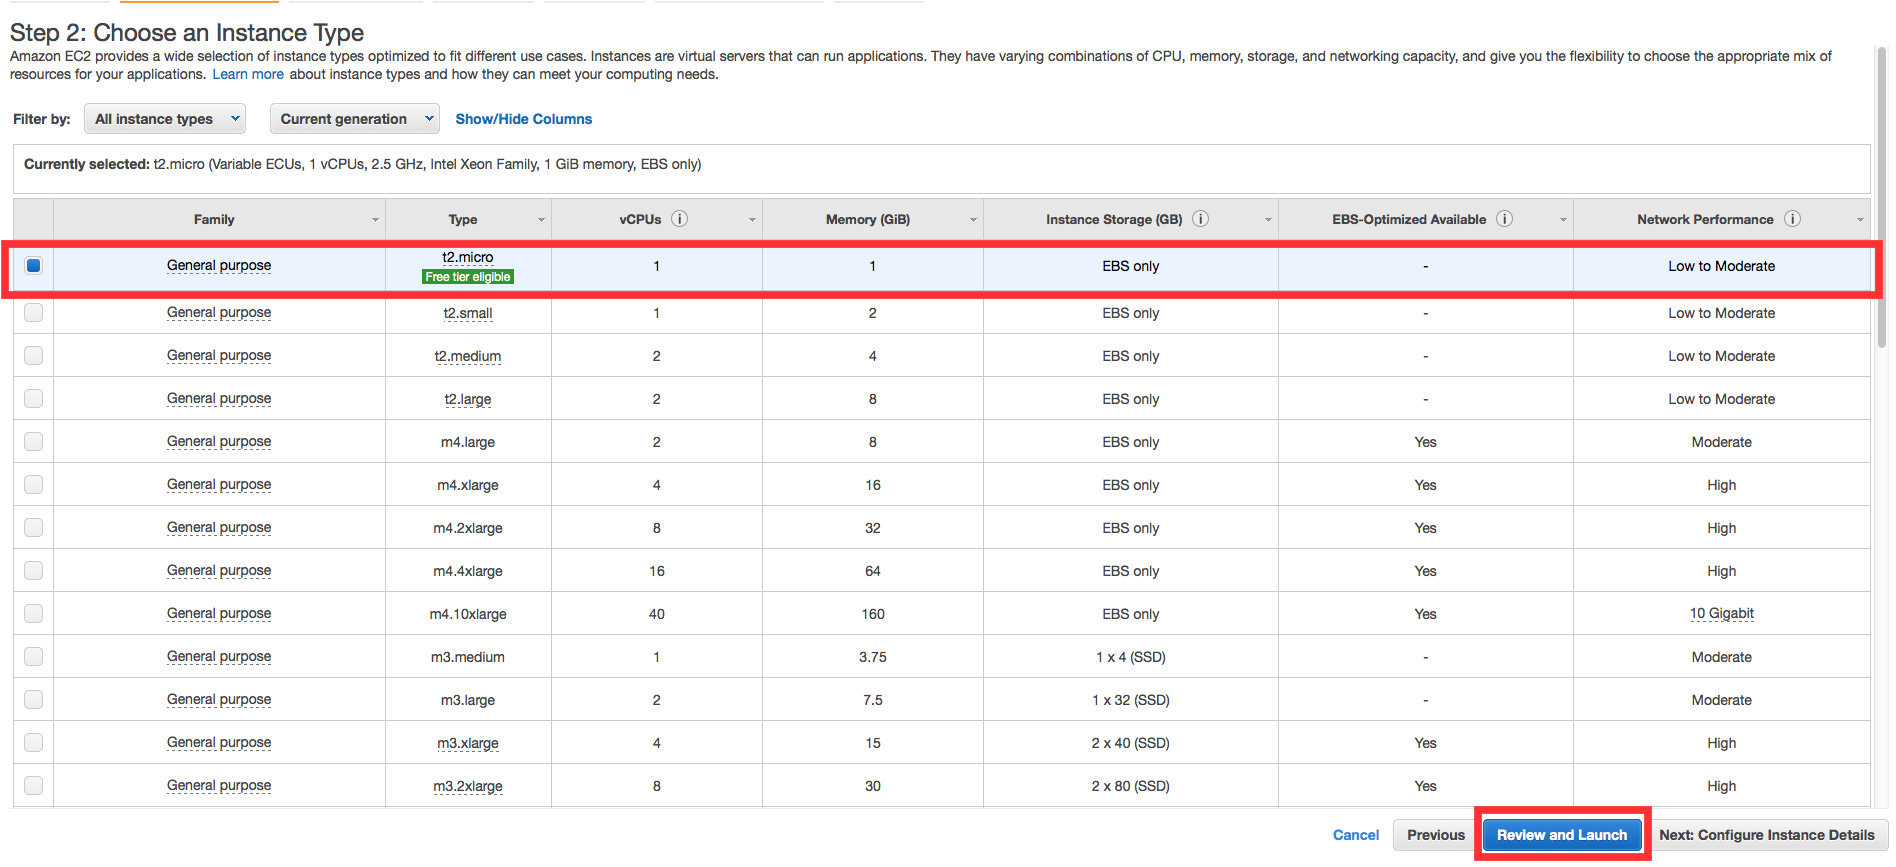
Select the one with a small green Free tier eligible label (usually a t2.micro type), then click on the Review and Launch button at the page bottom.

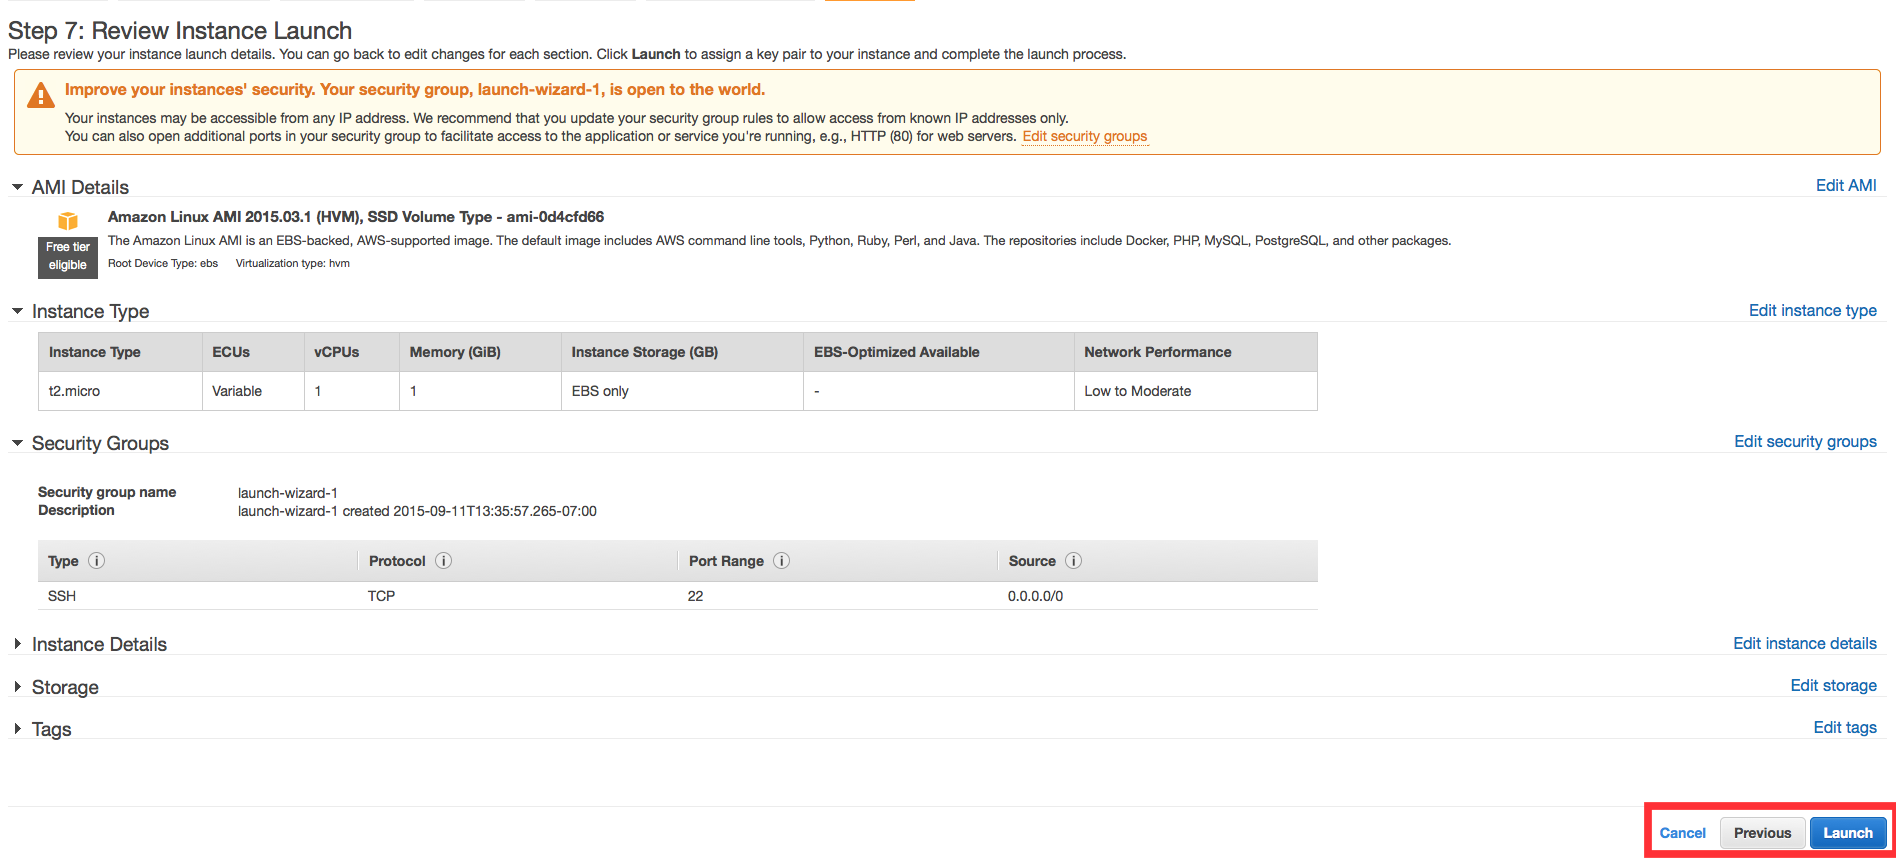
If no modification is needed, click on Launch button at the page bottom.

2. Launch
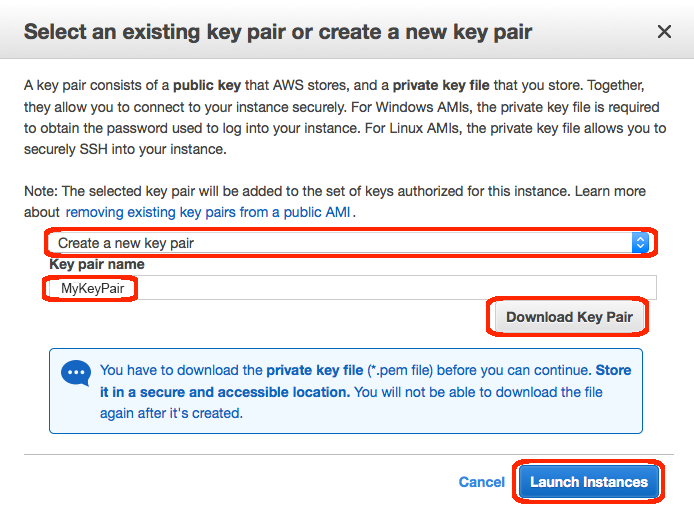
An SSH key pair is required to remotely access the instance, so either create a new one or provide an existing one in the next step.

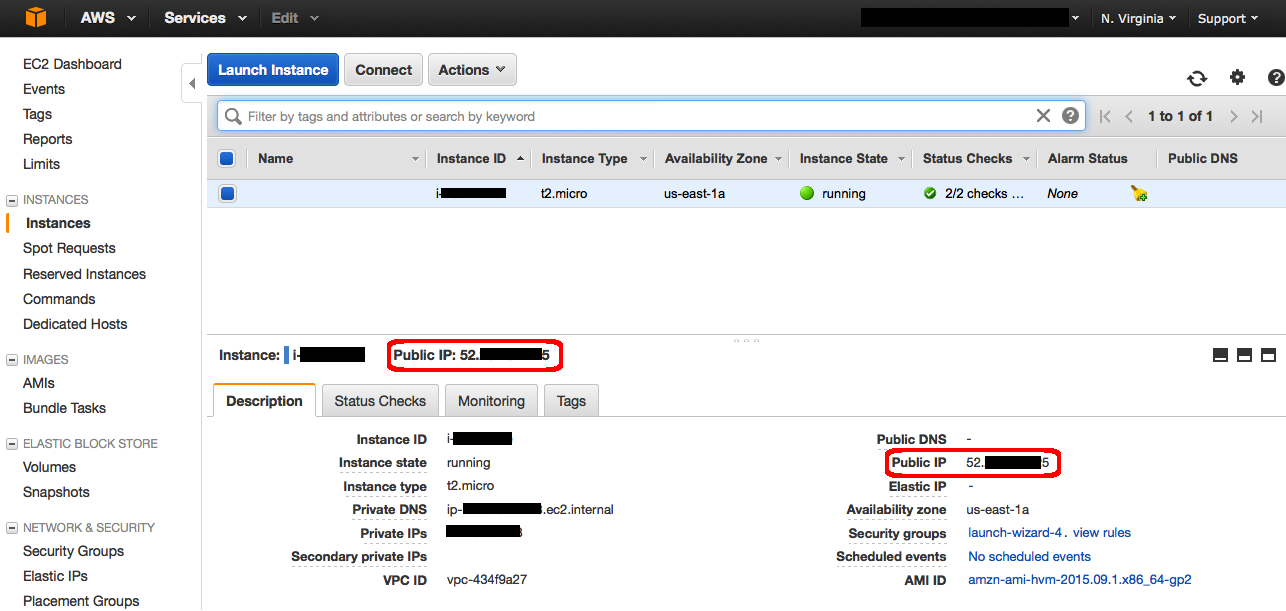
Once the instance has been successfully launched, it will appear in the console with running Instance State.

3. Connect through SSH
If you have never used SSH, this would be helpful to know how to set it up on Mac.
For Mac and Linux users, move the key pair into the .ssh sub-directory under home directory by bash in terminal,
mv ~/Downloads/MyKeyPair.pem ~/.ssh/MyKeyPair.pemRestrict permissions to your private SSH key by using chmod 400, making sure it is not publicly viewable,
chmod 400 ~/.ssh/mykeypair.pemThen connect to instance by entering,
ssh -i ~/.ssh/MyKeyPair.pem ec2-user@{IP_Address} The exact command to enter could also be found by clicking the Connect button on the console panel.
4. Terminate
Terminate the instances you are no longer using so you don’t keep getting charged for them.
Back on he EC2 Console, select the box next to the instance you created.
Then click the Actions button, navigate to Instance State, and click Terminate.
It can take several seconds to complete.

Once your instance has been terminated, the Instance State will change to terminated on your EC2 Console.

Written by Warren who studies distributed systems at George Washington University. You might wanna follow him on Github