Distributed Systems Practice Notes
Cloud Web Apps - Deploy a Node.js web app using Elastic Beanstalk
October 16, 2018
This tutorial is about how to set up an Elastic Beanstalk environment, and how to deploy a Node.js web app in that environment. At last, we will try to configure a high availability environment by setting the minimum instance amount to 2, which is more than easy.
Prerequisites
Authorization to create elastic beanstalk app, see Piazza, use your own aws console account rather than the education account.
Official Links
AWS Tutorial: Deploy a Scalable Node.js Web App
Operations
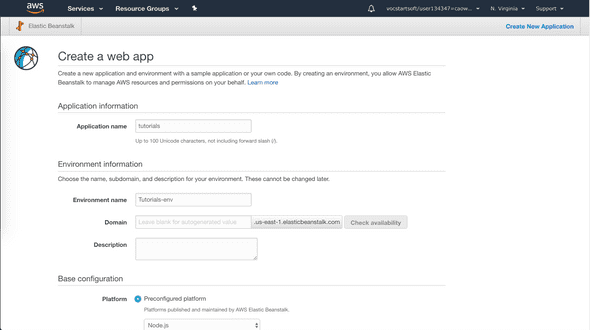
1. Create Elastic Beanstalk App and Launch
-
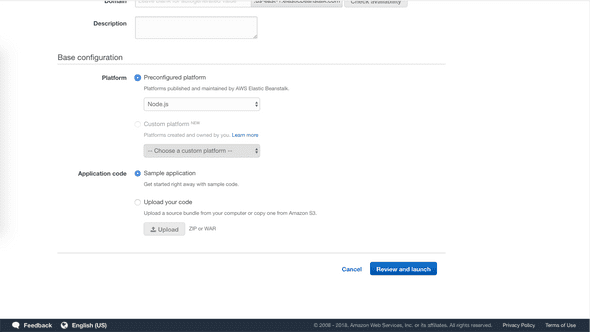
Choose Application code as Sample application
-
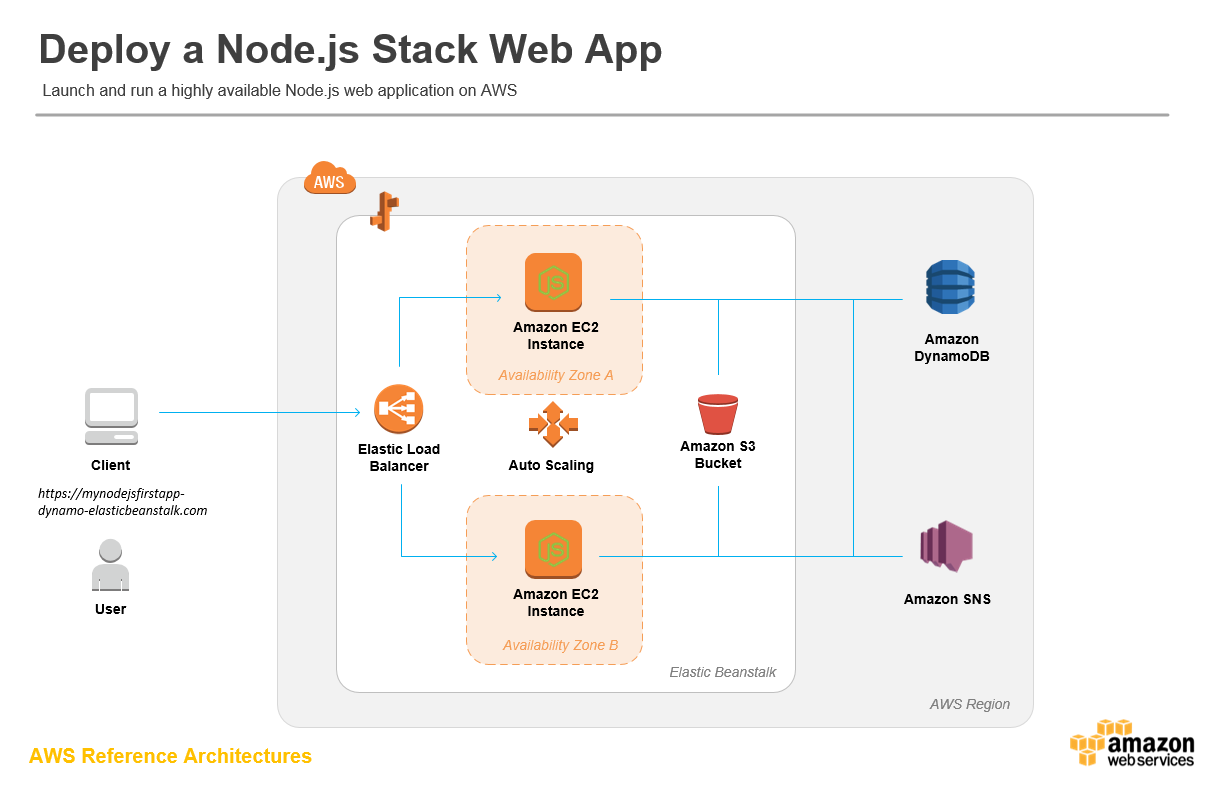
In 5 minutes, Elastic Beanstalk creates the environment with the following resources,
- EC2 instance
- Instance security group
- Load balancer
- Load balancer security group
- Auto Scaling group
- Amazon S3 bucket
- Amazon CloudWatch alarms
- AWS CloudFormation stack
- Domain name
2. Add Permissions to Your Environment’s Instances
-
Open the Roles page in the IAM console.
-
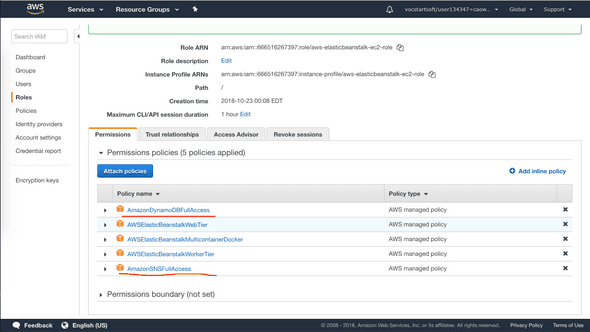
Choose aws-elasticbeanstalk-ec2-role
-
Attach Policies
- AmazonSNSFullAccess
- AmazonDynamoDBFullAccess
3. Deploy the Sample Application
- Download the source bundle from Github
- Open the Elastic Beanstalk console
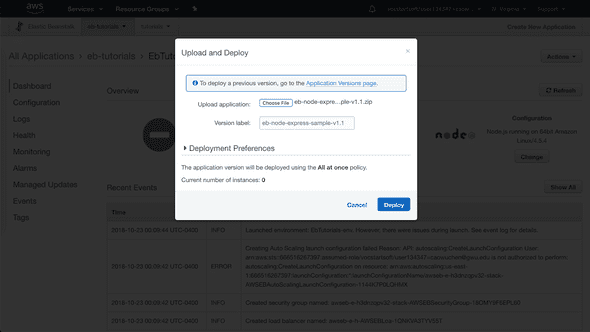
- Choose Upload and Deploy, select the source bundle
4. Create a DynamoDB Table outside Elastic Beanstalk
- Table name: nodejs-tutorial
- Primary key: email
- Primary key type: String
5. Update the Application’s Configuration Files
-
Unzip the source file bundle
-
Open .ebextensions/options.config and change the values of the following settings:
- NewSignupEmail: YOUR EMAIL
- STARTUP-SIGNUP-TABLE: nodejs-tutorial
This configures the application to use the nodejs-tutorial table instead of the one created by .ebextensions/create-dynamodb-table.config, and sets the email address that the Amazon SNS topic uses for notifications.
- Remove .ebextensions/create-dynamodb-table.config, so that the next time you deploy the application, the table created by this configuration file will be deleted
~/nodejs-tutorial$ rm .ebextensions/create-dynamodb-table.config- Zip the modified source bundle and deploy again
6.Configure Your Environment for High Availability
- Open the Elastic Beanstalk console
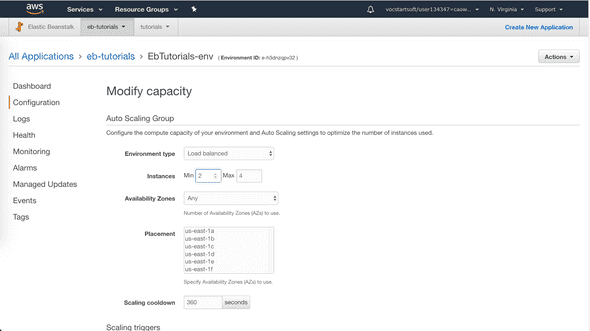
- Choose Configuration
- On the Capacity configuration card, choose Modify
- In the Auto Scaling Group section, set Min instances to 2.
7. Cleanup
- Open the Elastic Beanstalk console
- Choose Actions, and then choose Terminate Environment
- Delete DynamoDB table nodejs-tutorial

Written by Warren who studies distributed systems at George Washington University. You might wanna follow him on Github
